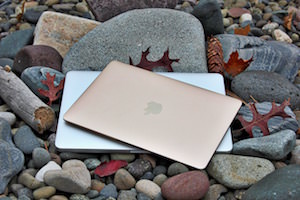
The Apple MacBook Pro with Retina display has one annoying flaw: Not enough storage. Many shipped with a paltry 128GB of built-in flash storage while most shipped with just 256GB. The question now is, “How can I upgrade my Retina MacBook Pro with more SSD storage?” The best storage solution is upgrading to a larger built-in SSD drive, which means you’ll need to open up your case and install the new drive. This is pretty easy these days, but if you’re worried, there are two easier options. Instead of installing a new internal flash-based SSD drive, you can use tiny flash-based drives in the shape of camera memory cards. They plug into the SDXC card slot on your MacBook Pro.
The TarDisk Pear system is a tiny drive that you can combine with your built-in drive to create a single “fused” storage system on your MacBook Air or Pro.
For all intents and purposes, the Transcend JetDrive Lite acts like a little USB thumb drive — but it fits flush into the SDXC card slot instead of a USB port. When installed, it appears on your Mac like an external drive that is always on, always available. It appears as a separate storage option to your Mac’s operating system yet remains assessable because you don’t have to worry about plugging it in since you leave it installed. It’s quite handy but you have to pay attention to where you’re storing things — on your built-in storage drive or on the JetDrive Lite. The TarDisk Pear system, on the other hand, also uses the SDXC card slot, but when you install it with an included software program, it combines with your built-in storage to form a single “fused” drive. If you want a near-permanent — but easy storage solution for your Retina MacBook Pro — the TarDisk Pear system might be your best bet. Are there any downsides to these two solutions? The SDXC card slot storage drives are not as fast as a dedicated internal drive, and they basically mean you won’t be transferring your photos using that slot anymore (if you do at all). Moving on, let’s get back to replacing your drive: If you need more storage space on your Retina MacBook Pro — up to a whopping 1TB — two companies have upgrade kits that can help you do it.
The MacBook Pro with Retina Display Storage Upgrade
While the MacBook Pro seems to be a sealed case, you can open it up to upgrade the solid-state flash storage with a new, larger solid-state drive. Is it hard? Yes and no. If you’re moderately handy, you can do it. Here’s how to do it in 5 steps:
1. Identify Your MacBook Pro with Retina Display
Not all MacBook Pro with Retina display MacBooks contain the same flash storage system, and you have to match your MacBook Pro to the kits that it is compatible with. Right now, you can get upgrade kits from Transcend or OWC if you have the “Mid 2012,” “Late 2012,” and “Early 2013” MacBook Pro 13-inch and 15-inch with Retina display models. If you have a “Late 2013,” “2014,” or “2015” model MacBook Pro, the only company that produces internal SSD upgrade kits that I’m aware of and recommend is OWC. (Apple didn’t make upgrading these new MacBook Pro models easy, but OWC figured out how to create an option for us, which we appreciate.) How do you figure out which MacBook Pro model number you have? You can go to the upper left Apple menu on your screen and select “About This Mac.” The popup window will have the basic model description and year description of release in it. If you have any trouble with this, Apple has a support page that will help you identify your MacBook Pro model number, along with the serial number, etc. The description has wording like “15-inch, Mid 2012″ or “13-inch, Early 2013.”
2. Find the SSD Storage to Fit Your MacBook Pro with Retina Display
Basically, you have two great choices of manufacturers, OWC and Transcend. You can buy direct from OWC or get Transcend’s kits from Amazon. Transcend’s new JetDrive 720 MacBook Pro with Retina display SSD upgrade kits come with the tools you need, including a handy enclosure for your old drive. OWC’s Aura Pro + Envoy Pro is also a kit that includes the SSD storage module, the correct screwdrivers, plus a cable and case to help transfer your data to the new drive. Here’s the kit links for both options, but as I mentioned above, only OWC offers kits for older Retina MacBooks as well as the newer “Late 2013” up to “2015” MacBook Pro with Retina display models. Transcend only offers models that fit Mid 2012, Late 2012, and Early 2013 MacBook Pros with Retina displays in 13-inch or 15-inch models:
- OWC Aura Pro + Envoy Pro — the kit comes in 240GB, 480GB, and 1TB options
- Transcend JetDrive 720 — the kit comes in 240GB, 480GB, or 960GB options
3. Clone or Transfer Your Data to the New SSD Drive
While I use Carbon Copy Cloner, which is a third-party app that lets you make complete clones of your drives or create ongoing backups, you can also use Apple’s Time Machine or boot into recovery mode and use Apple’s built-in Disk Utility to get the job done. Transcend, it turns out, recommends that you use Apple’s Disk Utility, which is a fairly simple way to go (see step 4).
Note: The MacBook Pro SSD drives are exposed modules that are more fragile than a fully enclosed hard drive. Before you crack the case and handle the modules, you might want to have a separate backup of your important data. There are a lot of ways you can back up your data, but the easiest way is to choose an external hard drive and use Carbon Copy Cloner to clone your entire drive as a bootable backup to your external drive. Alternately, you can just copy your important photos, videos, and documents. (Bonus: The key benefit of an external drive is that you can store it somewhere that is not your home — for example, if there’s a fire, your important family photos will be safe.)
4. Check Out Video Walkthroughs and Online Guides
OWC provides excellent video guides on its website, but I also like the Transcend video walkthrough, which is fast and clear:
After you watch the guides, if all this seems too risky for your skills, find a buddy who has done it before — or have your local computer store do it for you.5. Perform Your Retina MacBook Pro Storage Upgrade
The data cloning process might take a couple of hours, but the actual installation should take less than half an hour. You want to do the installation in a clean place with enough free time without distractions to complete the process end-to-end. You may also want to consider buying an anti-static mat. Personally, I’ve never bothered, but I’ve been willing to take my chances. Proceed at your own risk. Finally, don’t rush through it. Pay attention and put all the tiny screws in a bowl so they don’t roll off your desk and get lost in your carpet. I’ve known some guys to set the screws on a tray in the relative position that they removed them — just to make sure they put the right screw in the right spot during reassembly.
What’s Next?
Keep taking photos, making movies, and fill up your new drive! At the very least, you can always use the handy external portable hard drive from your kit to store content that doesn’t absolutely have to be on your MacBook Pro with Retina display. . . making it even easier to have enough storage for your Mac.
Get the Gear:
- OWC Aura Pro + Envoy Pro — in 240GB, 480GB, or 1TB
- Transcend JetDrive 720 — in 240GB, 480GB, or 960GB
- Carbon Copy Cloner
- Rosewill Anti-Static Mat
- Transcend JetDrive Lite
- TarDisk Pear system