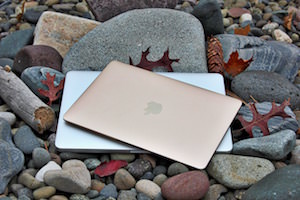
With a little planning, upgrading to a fast solid state drive like the Crucial M550 SSD — or the newer BX200 — is doable for many handy MacBook Pro owners.
After you decide to get rid of your old and slow hard drive and replace it with a new and wicked-fast Solid State Drive (SSD), the question is how? You will have to open up the sleek case of your Apple MacBook or MacBook Pro and mess around with magic. Are you up to the task? What tools do you need?
Don’t stress. It’s not so hard. Here’s the all the key steps to make it easy:
1. Find an SSD Drive
You can spend hours or days agonizing over which SSD drive is slightly faster than another, but it’s best to choose the biggest Crucial or Samsung SSD you can afford and get on with your life. Seriously. Don’t overthink it. Personally, I believe the Crucial BX200 offers the best bang for your buck, but the MX200 is slightly faster and offers a few more gigabytes of storage on each drive — buy according to your budget.
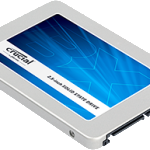
The Crucial BX200 offers great speed and value for an SSD drive.
2. Get a Toolkit
You’re going to need a toolkit that has tiny screwdrivers to handle some very small screws, most notably Phillips (#00) and Torx T6. You can likely get away with a cheap kit, but the risk is hitting a stubborn screw and stripping out a cheap screwdriver, leaving your upgrade on pause until you can get another screwdriver. Check out the iFixit 26 Bit Driver Kit or the LB1 High Performance New Mini Universal Tools Kit for Apple MacBook Pro to cover most of your bases now and in the future.
3. Get a Drive Enclosure or Cable
While you can recreate your Mac with a brand new install by manually copying over files and recreating all your settings, the easiest way is to clone your entire existing hard drive onto your new SSD. Then you can remove the old hard drive and swap in the new SSD, which will let you get up and running super fast. Avoid the cheap and slow USB 2.0-based drive enclosures because your clone process could take 6-to-12 hours. A USB 3.0 drive enclosure or cable will cost a bit more, but the speed is worth it. Try the ORICO USB 3.0 2.5-inch External Hard Drive Enclosure Adapter Case or the Syba USB 3.0 to SATA Device Adapter Cable.
* Bonus: If you use the enclosure method, put your old hard drive inside it and use it as a backup drive or for extra portable storage.
4. Get Your Cloning Software
You can mess around with Apple’s Time Machine, but I personally prefer the simple, direct ease of Carbon Copy Cloner. Carbon Copy Cloner shines when you buy it outright and is excellent for backups, but you can create a fully bootable copy of your hard drive with the trial version.
5. Walk Through Online Guides Before You Crack the Case
It’s a very good idea to familiarize the process by watching an online video or step-by-step guide online. Surgeons practice and visualize, and you should, too. Check out iFixit’s line of Mac Repair guides by selecting the Mac model you want to upgrade. For a video, check out the guide by Matt Gonzalez below — it shows how to boot from a recovery USB stick as an alternative to cloning your drive:
6. Plan Your Time
The cloning process will likely take a couple of hours depending on how much data you have to move. Plus, whenever you crack any device case, you want to have the time to complete the job without interruption.
7. Proceed with Caution and Know Your Limits
Go slow. Place the tiny little screws in a bowl so they don’t roll off your desk and get lost in your carpet. Watch out for static electricity. After you watch the guides, if all this seems too risky or scary for your skills and personality, find a buddy who has done it before — or have your local computer store do it for you.
What’s Next?
Revel in the speed and snappiness of your newly revitalized MacBook or MacBook Pro! Oh, one more thing: If you’ve got 4GB of memory, consider upgrading to 8GB while you’ve got your case open: Here’s how to upgrade your memory. The combination of at least 8GB with an SSD is fantastic and will give you plenty of oomph to get you through another year or two, especially as you upgrade Mac OS X as Apple releases new versions. (If you have to choose one upgrade, though, go with the SSD.)
Get the Gear:
- SSD — Crucial BX200, MX200, or Samsung 850 Evo
- Enclosure — ORICO USB 3.0 2.5-inch External Hard Drive Enclosure Adapter Case
- Software — Carbon Copy Cloner
- iFixit 26 Bit Driver Kit