If you have run out of storage space in your MacBook Air or MacBook Pro with Retina display, don’t cry over your paltry 128GB drive or marginal 256GB of built-in flash-based storage just yet — you have a few cool ways to increase storage that don’t include choosing a new MacBook Pro with more storage.
Before you choose your storage upgrade method, I always advise MacBook users to delete or offload large files they don’t really need.
How to Save Space on a MacBook
Start by spending a few hours going through your Photos library and deleting those extra photos and video from your birthday party three years ago — do you really need three dozen birthday photos? Probably not. Pick a few good ones and delete the rest.
Next, delete any iTunes TV shows or movies you don’t plan on watching any time soon. Why? As part of your Apple iTunes account, nearly all of this purchased content can be downloaded again if you plan to binge on a series or go on a road trip. The last time I did this, I trimmed out 54GB of video — and it’s all waiting for me on some Apple server, ready to be downloaded again if I need it.
There is one more big storage win you need to know about: iOS device backups. If you backup your iPhone or iPad on your MacBook, go into iTunes, open Preferences, then select Devices. You’ll see a list of device backups. Delete any old, unneeded backups from older iPhones. As I typed this last sentence, I just deleted an old iPhone 5 backup and gained 7GB of space. This method only gets more useful as you upgrade your iPhones and/or iPads.
Now that you’ve done a little MacBook storage housekeeping, you’ll have a better idea how dire your storage needs really are, which will help you choose from your storage upgrade options below. Of course, to be fair, there is only one real storage “upgrade” and that’s number one on the list. Why? The rest are more technically workarounds that add storage to solve your storage needs in relatively simple ways.
5 Easy MacBook Air and Pro Storage Upgrades
1. Upgrade the Internal MacBook Drive
If you have a MacBook Air or MacBook Pro with Retina display, the internal solid state drives are glued into the case. A handful of older models are user upgradable through some handy kits, and if you have one of these MacBooks, this kind of upgrade will give you the best overall performance and ease-of-use.
To learn if you have a MacBook that has an SSD drive that you can upgrade yourself, check out, “How to Upgrade Your MacBook Air SSD,” or “How to Upgrade Your Retina MacBook Pro SSD Drive.”
If you have have a non-Retina 13-inch MacBook Pro, your storage upgrade is super easy: Check out, “How to Upgrade Your MacBook Pro with a Solid State Drive (SSD).”
2. Use the SDXC Card Slot
The 13-inch MacBook Air and MacBook Pros all have SDXC card slots, which are used to make loading photos and video from cameras easy. Even if you use your SDXC card slot for this purpose, you don’t have to — many cameras can connect directly through USB, or you can pick up a USB-based card reader. So how do you use an SDXC card slot for your storage upgrade?
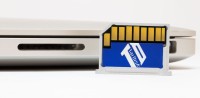
You can easily add storage to a MacBook Air or MacBook Pro with Retina display with an SDXC card slot drive option like the TarDisk Pear system.
You have two basic choices, both of which cram up to 256GB of flash-based storage into what is essentially a tiny memory card that has been cut down to fit flush against the side of your MacBook. The first way is to use this card much like a tiny USB thumb drive — the drive will show up on your MacBook’s screen just as if you inserted a thumb drive or attached an external drive. You can drag and drop files onto the drive — or even move your iTunes library over to it. It’s very easy, but it also requires you to pay just a bit of attention to where you’re storing files. Check out the Transcend JetDrive Lite series.
The second option is semi-permanent but it’s also more seamless: The TarDisk Pear system bundles a slim aluminum flash-based memory card with an easy-to-use installation program that “fuses” your new storage with the built-in storage on your MacBook. This results in a drive that appears to be one single unified drive, and your MacBook stores your files and programs so that your most-used materials end up on your faster built-in drive.
The downside? If you want to remove the TarDisk, you’ll have to walk through an unpairing process. As a near-permanent solution, though, the TarDisk is incredibly easy to install and results in a more seamless experience than other SDXC-based options.
3. Use a USB 3.0 Thumb Drive
Some MacBook lovers will be able to use a relatively fast USB 3.0 “thumb drive.” These little sticks have gotten smaller over the years, making them not only portable – but relatively unobtrusive when they stick out of the side of your MacBook. These affordable drives are dirt-simple and durable, and you can slip them into most every other Mac or PC and get access to your files, depending on what you’re storing, of course. The downside is that they are easy to remove, and if you don’t intentionally “eject” the drive first, you could experience some data loss. So, again, as a storage upgrade solution, you have to pay attention to what files you’re storing on these drives — and pay attention to when you’re going to insert or remove them.
Check out the SanDisk Ultra Fit 128GB USB 3.0 Flash Drive — it’s a tiny drive that you could leave in your USB port all the time.
4. Use an External Hard Drive
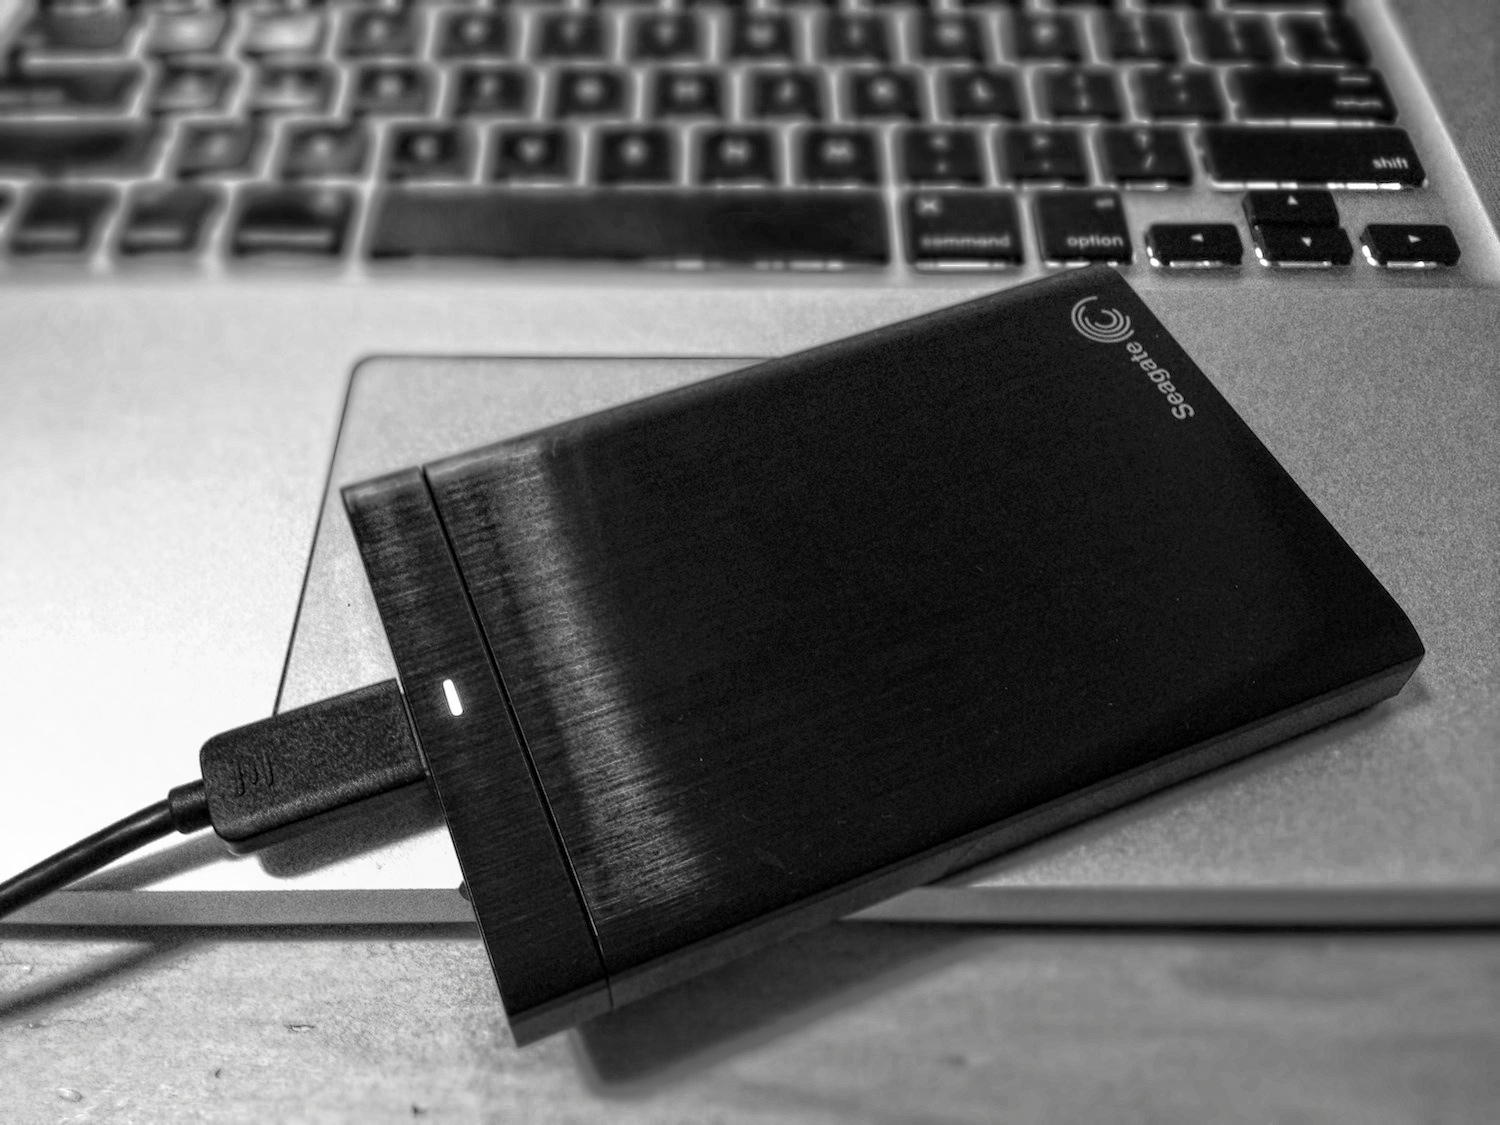
External hard drives are bulky ways to add storage to a mobile MacBook — but they are cost-effective.
If you tend to use your MacBook on a desk, you can get a full-size external hard drive, some of which are small and rugged enough to travel with if you needed to. I recommend bus-powered drives so that you don’t need an extra power cable, and USB 3.0 drives are capable enough for most everyone. If you have a MacBook Air or Pro with a Thunderbolt port, you can get a Thunderbolt-based drive, but USB 3.0 drives are usually more cost-effective. In addition, if you have a truly massive photo or video library, external storage is by far the most cost-effective way to save it.
Again, the downside here is that you have to pay attention to how you use your external drive — and, of course, remember to back it up, too.
Need a recommendation? I like the Seagate Backup Plus Slim 1TB Portable External Hard Drive for Mac.
5. Use an Online Cloud Service

TarDisk is an easy integrated storage upgrade for MacBook Air and MacBook Pro: Use code WICKEDDISCOUNT to get 10% off today.
Apple, Dropbox, Microsoft, and Google all offer online storage options, but if you’re reading this article, you need a lot of storage space, which will usually cost you a monthly fee — but not always. If you’re only storing photos and home video, you can use Google Photos free — unless you’re shooting photos that are more than 16 megapixels, in which case you’ll pay $2-10 per month for 100GB to 1TB of data. The free option is a great deal, but Google also mines your photos for data, which it then uses to make it services better — and to serve up ads to you. Google has the ability to scan photos and make judgements based on the content of your photos, in addition to reading the metadata in your photos, which provides time and GPS-based location stamps from when and where your took them.
Apple’s iCloud service, on the other hand, treats you as a customer, and Apple seems to be a company that would prefer to not know so much about you, nor collect as much data about you — but you’ll pay for this: 50GB of iCloud space is $1 per month, 200GB is $3, and 1TB is $10. These prices are pretty reasonable, and Photos and iCloud have the ability to place compressed files on your devices, helping you save some space on your MacBook or iPhone.
Use Caution with the Cloud
However, all of these cloud services come with risks beyond the monthly costs: Your usernames and passwords need to be secure, and hopefully no one will ever want to hack or use social engineering to compromise your online accounts. If you forget your password and/or lose your iPhone, good luck working through the bureaucracy of these behemoth companies to regain access to your precious photos and data: For example, if you lose your keys to your house, you can always break the door down to get access to your stuff — not so with cloud services. Cloud services for individuals don’t play well with the challenges of life faced by everyday consumers. On the flip side, cloud services can provide an off-site backup for you, which is handy in case of natural disasters or fires.
Personally, I’m a fan of storage devices and upgrades that I can directly control and access in person, which is why I recommend hardware solutions most often.
Get the Gear:
MacBook Air SSD Drives:
MacBook Pro with Retina SSD Drives:
Non-Retina MacBook Pro SSD Drive:
SDXC Card Drives:*
Small USB 3.0 Thumb Drives:
External Drives:
* Of course, if you use your SDXC card slot for loading photos, you can pick up a small USB-based card reader like the Kingston Digital MobileLite G4 Card Reader to easily load photos and video off of your SD camera cards through a USB port.